A Comprehensive Guide to the ESP8266 Family of Microcontrollers
The ESP8266 family of microcontrollers has gained significant popularity in the realm of Internet of Things (IoT) due to its affordability, versatility, and robust features. In this guide, we will explore the ESP8266 microcontroller series, covering its various modules, programming basics, and advanced capabilities. Whether you’re a beginner or an advanced user, this article will provide you with a deep understanding of the ESP8266 and its potential applications.
Introduction to the ESP8266
The ESP8266 is a low-cost Wi-Fi microchip with full TCP/IP stack and microcontroller capabilities. Developed by Espressif Systems, it has become a favorite among hobbyists and professionals for its ability to integrate Wi-Fi connectivity into a wide range of projects. Its popularity can be attributed to its low cost, ease of use, and the rich ecosystem of tools and libraries available for it.
Overview of ESP8266 Modules
The ESP8266 family includes several modules, each with unique features and use cases. Here’s a brief overview of some of the most common modules:
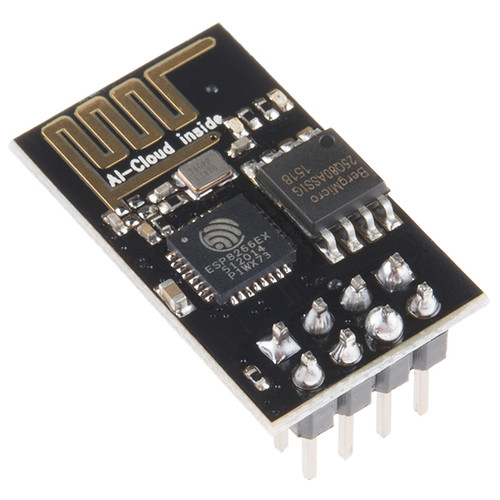
ESP-01
The ESP-01 is one of the earliest and most basic modules in the ESP8266 family. It features 2 GPIO pins and is used primarily for simple projects requiring minimal I/O capabilities. Despite its limited I/O options, it’s a great starting point for beginners.
ESP-12
The ESP-12 offers a significant upgrade from the ESP-01, providing more GPIO pins and a more robust design. It is commonly used in various IoT applications and serves as the basis for many development boards.
NodeMCU
The NodeMCU is a popular development board that incorporates the ESP-12 module. It features a USB interface for easy programming and a more extensive range of GPIO pins. The NodeMCU is favored for its ease of use and is a great choice for both beginners and advanced users.
Getting Started with the ESP8266
To begin working with the ESP8266, you’ll need to set up your development environment. Follow these steps:
1. Setting Up the Development Environment
First, install the necessary drivers for your ESP8266 module. For Windows, you can find drivers on the ESP8266 Arduino GitHub repository. For Linux and macOS, drivers are typically included in the operating system or can be installed via package managers.
2. Choosing and Configuring an IDE
Two popular IDEs for programming the ESP8266 are the Arduino IDE and PlatformIO. Both IDEs support ESP8266 development and provide robust tools for writing and uploading code. Here’s how to set them up:
- Arduino IDE: Install the Arduino IDE from the official website, then add the ESP8266 board manager URL in the preferences and install the ESP8266 board package.
- PlatformIO: Install PlatformIO via its official website, then add ESP8266 support through the PlatformIO IDE or command line.
3. Flashing Your First Program
Start with the classic ‘Blink’ example to test your setup. Here’s a basic example using the Arduino IDE:
#include <Arduino.h>

// Pin to which the LED is connected
const int ledPin = 2;

void setup() {
  pinMode(ledPin, OUTPUT);
}

void loop() {
  digitalWrite(ledPin, HIGH);  // Turn the LED on
  delay(1000);                 // Wait for a second
  digitalWrite(ledPin, LOW);   // Turn the LED off
  delay(1000);                 // Wait for a second
}
Basic Programming with ESP8266
Once you have your development environment set up, you can start programming the ESP8266 to interact with various components:
GPIO Control
The ESP8266’s GPIO pins can be used to control LEDs, motors, and other peripherals. Here’s an example of controlling an LED:
#include <Arduino.h>

const int ledPin = 2;

void setup() {
  pinMode(ledPin, OUTPUT);
}

void loop() {
  digitalWrite(ledPin, HIGH);
  delay(500);
  digitalWrite(ledPin, LOW);
  delay(500);
}
Reading Sensors
To read data from sensors, connect the sensor to an appropriate GPIO pin and use analog or digital reading functions. Here’s an example of reading an analog temperature sensor:
#include <Arduino.h>

const int sensorPin = A0;

void setup() {
  Serial.begin(9600);
}

void loop() {
  int sensorValue = analogRead(sensorPin);
  Serial.println(sensorValue);
  delay(1000);
}
Intermediate Topics
As you become more comfortable with the ESP8266, you can explore more advanced topics:
Connecting to Wi-Fi
Connect the ESP8266 to a Wi-Fi network using the following code:
#include <ESP8266WiFi.h>

const char* ssid = "your_SSID";
const char* password = "your_PASSWORD";

void setup() {
  Serial.begin(115200);
  WiFi.begin(ssid, password);

  while (WiFi.status() != WL_CONNECTED) {
    delay(500);
    Serial.print(".");
  }

  Serial.println("Connected to Wi-Fi");
}

void loop() {
}
Making HTTP Requests
To communicate with web servers, use the ESP8266WiFi library for HTTP requests:
#include <ESP8266WiFi.h>
#include <ESP8266HTTPClient.h>

const char* ssid = "your_SSID";
const char* password = "your_PASSWORD";
const char* serverName = "http://your-server.com";

void setup() {
  Serial.begin(115200);
  WiFi.begin(ssid, password);

  while (WiFi.status() != WL_CONNECTED) {
    delay(500);
    Serial.print(".");
  }

  HTTPClient http;
  http.begin(serverName);
  int httpCode = http.GET();
  String payload = http.getString();
  Serial.println(httpCode);
  Serial.println(payload);
  http.end();
}

void loop() {
}
Working with MQTT
MQTT is a lightweight messaging protocol often used in IoT applications. Here’s a basic example of using MQTT with the ESP8266:
#include <ESP8266WiFi.h>
#include <PubSubClient.h>

const char* ssid = "your_SSID";
const char* password = "your_PASSWORD";
const char* mqttServer = "broker.hivemq.com";
const int mqttPort = 1883;

WiFiClient wifiClient;
PubSubClient client(wifiClient);

void callback(char* topic, byte* payload, unsigned int length) {
  Serial.print("Message arrived [");
  Serial.print(topic);
  Serial.print("] ");
  for (int i = 0; i < length; i++) {
    Serial.print((char)payload[i]);
  }
  Serial.println();
}

void reconnect() {
  while (!client.connected()) {
    if (client.connect("ESP8266Client")) {
      client.subscribe("test/topic");
    } else {
      delay(5000);
    }
  }
}

void setup() {
  Serial.begin(115200);
  WiFi.begin(ssid, password);

  while (WiFi.status() != WL_CONNECTED) {
    delay(500);
    Serial.print(".");
  }

  client.setServer(mqttServer, mqttPort);
  client.setCallback(callback);
}

void loop() {
  if (!client.connected()) {
    reconnect();
  }
  client.loop();
}
Advanced Topics
For those who wish to delve deeper, consider exploring these advanced features:
Performance Optimization
Optimize the performance of your ESP8266 projects by managing memory usage and processing power. Utilize ESP8266 technical references for detailed guidance.
Power Management
Efficient power management is crucial for battery-operated devices. Explore deep sleep modes to conserve power:
#include <ESP8266WiFi.h>

void setup() {
  WiFi.disconnect();
  delay(1000);
  ESP.deepSleep(10e6);  // Sleep for 10 seconds
}

void loop() {
}
Advanced Networking
Explore advanced networking techniques such as mesh networking or creating a soft AP (Access Point). For more information, refer to the Espressif resources.
Security Practices
Ensure your applications are secure by using HTTPS and securing your Wi-Fi connections. Refer to OWASP guidelines for best practices in security.
Mastering the ESP8266
To truly master the ESP8266, consider the following:
Developing Complex Projects
Design and develop complex IoT projects by integrating the ESP8266 with other platforms such as AWS IoT or Google Cloud IoT.
Real-World Applications
Explore real-world applications such as smart home automation, environmental monitoring, and industrial IoT. Examples include:
- Smart thermostats and lighting systems.
- Remote environmental sensors for agriculture.
- IoT solutions for manufacturing and logistics.
By understanding the ESP8266’s capabilities and leveraging its features, you can create innovative and practical IoT solutions. Dive into the resources and communities available online to expand your knowledge and skills in using this versatile microcontroller.